A brief tutorial on using strong neutral density filters…
As a true long-exposure enthusiast, I often found myself waiting until the sun went down so that I could take advantage of the lack of light and capture motion in a single frame – whether it be clouds moving across the sky, headlights and tail-lights of moving vehicles in a cityscape, or my favorite: extremely long exposures of star trails while the earth rotates on it’s axis.
But there are too many opportunities to pass up in daytime photography where the scene can benefit from a long exposure. When the winds are high and the clouds are low, a 30-second exposure at 5pm can be rather dramatic. The same is true with a landscape scene that includes a fixed subject such as a barn surrounded by a field of tall grass blowing rapidly in the wind. This is why I obtained a 10-stop Neutral Density filter a while back. It has since become one of my most used accessories and my old 4-stop ND filter usually never even makes it into my bag when I pack for a photo trip. Solid Neutral Density filters (not to be confused with graduated neutral density filters or GNDs) simply allow less light to enter your camera’s sensor in a uniform way and are designed to affect color and contrast as little as possible. (This is the theory, anyway. But as I’ll touch on briefly, colour casts can be a side-effect to using strong ND filters)… My enthusiasm towards using this filter for creative photography really adds to my disappointment that the Canon TS-E 17mm does not take front or rear filters of any kind. (Not at the time of this writing, at least). If it weren’t for that, the 17mm TSE would be a near-perfect lens for my style of shooting.
Anytime I see fast-moving clouds, water, animals, vehicles or vegetation in the wind, I consider using an ND. The possibilities of creativity are wide open.
My solid ND filter of choice for these type of shots is the B+W brand 110 Neutral Density filter, which reduces the light entering the lens by 10 stops. This will take an exposure originally metered for 1/125 sec (@f/16, iso 100) and turn it into a 30-second long exposure. It goes without saying that you’ll need a sturdy tripod for shots like these. B+W is made by Schneider Optics and makes some of the highest quality filters out there. Some other excellent glass makers are Singh-Ray, Lee and Heliopan. Though these are expensive, I don’t recommend using the cheap brands, simply because when you are dealing with exposures this long during the day, the chances of glare and flare are high enough, even with high-end glass, so you don’t want to put sub-par optics in front of your lens because you’ll be increasing the chances of flare, even if you’re not shooting directly into the sun’s rays.
Metering and exposing
There are many ways to achieve accurate metering for heavily-filtered shots like this. Usually using in-camera TTL with the filter on is fairly inaccurate for ND filters this dense. With my Canon 1Ds MkII and MkIII, I can accurately meter TTL if I shut the viewfinder curtain… Mostly, I prefer to compose the shot and meter at whatever aperture I decide to shoot at (usually something small from f/11 or 22, depending on how long I want my exposure to be in the end) before I put the filter on. Then (working in manual mode) I will simply re-adjust the shutter speed ten stops overexposed. I have my exposure dial set to 1/3 of a stop per click, so for me using a ten-stop ND filter, it’s 30 clicks. Depending on your camera’s exposure settings, you might be set at 1/2 or a full stop per click, so adjust accordingly.
I usually always shoot at a lower ISO like 100 or even occasionally 50. This is because in most cases you’ll want to open for as long as possible. But even if you don’t, it’s best to stay at ISO 100 and work the exposure around your aperture setting instead of your ISO. Keep in mind that ISO 50 in most camera bodies isn’t a real ISO setting and will actually cause you to lose a little bit of dynamic range because the camera essentially ends up taking an ISO 100 shot and turning the exposure down afterward.
If the amount of stops reduced by your filter causes you to go beyond 30 seconds for your exposure, you will have to shoot in ‘bulb’ mode. In this case, every stop is a double of your exposure setting. For example: if you are using a 10-stop ND filter and you hit your 30-second-limit in manual mode after opening only 8 stops of shutter speed, then you still need to open up two stops longer by going into bulb mode. – One stop more is 60 seconds and another stop on top of that will leave you with an exposure of 120 seconds, etc… If you want to keep it simple and stay at 30 seconds or less, then adjust your aperture accordingly.
Here, I opened up to 30 seconds @ f/18 and being only 8 stops above my normal metered test, I still had two stops to go. Instead of going all the way to 120 seconds, I decided to open the aperture to f/9 and leave the exposure at 30 seconds. This let me capture some movement in the clouds without completely blurring them into a smeared look, which is what a 2-minute exposure would have done.
You’ll want to use a cable release or remote, in addition to your tripod to help avoid soft images. Enabling mirror-lockup will be to your benefit as well.
Not completely neutral?
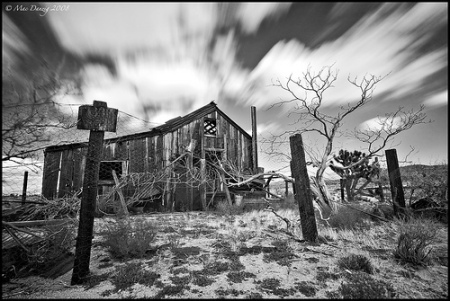
Even though these filters are designed to not alter your colors in any way, once you get beyond the 6-stop range, you may have strange colour casts, usually in the purple or magenta range. This is because of the higher red transmission (up to and sometimes above 700nm). Some people may like this warmer look, but overall, it becomes unrealistic. You have two options to try here… 1) You can adjust the tint of the RAW file (please shoot in RAW) to take away the magenta colour cast. This usually involves pulling the slider in your raw-converter to the left (green side) quite a bit until normal white balance is obtained. or 2) Simply convert to black and white. I find the second option is often the best, as surreal images like ones created by a ND filters can frequently benefit from a black and white or split-tone conversion.

the magenta cast here caused by the filter has a slightly unnatural look, even when the white balance is adjusted properly.
Vignetting is also a problem with these filters, especially the screw-on variety. And if you’re using a very wide angle lens, this issue is compounded. I find myself using my raw converter to reduce the vignetting to a more normal look. Lightroom 2 is my raw converter of choice.
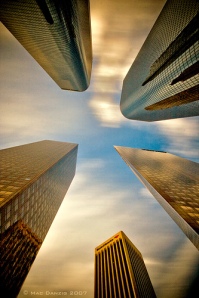
The vignetting pretty much ruined this shot and it was too strong to repair in photoshop. The only alternative would be to crop it to exclude the top and bottom edges.

The tint in this shot of Schwabacher Landing in Grand Teton National Park had to be heavily adjusted to bring the blue sky back to it's normal tone... 80-second exposure - f/11 - ISO 100 - 17-40L @ 19mm - Canon 5D

This particular shot is an example of a scene that benefited from the warmer tones the ND filter produced and did not need to be adjusted. It was shot just after the sun set.
Creativity
There’s a lot of things you can do with the option of opening up the shutter for long periods, you just have to be willing to experiment and use your imagination. Moving water and streaking clouds are not the only possibilities.
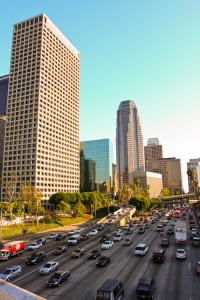
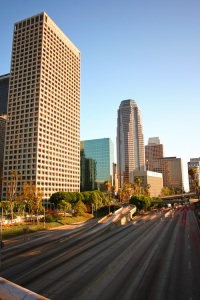
The first of the above two images is the normal exposure. The second is the same shot taken with a 10-stop ND filter, letting the shutter open for 20 seconds. This rendered even the slower moving cars almost invisible.
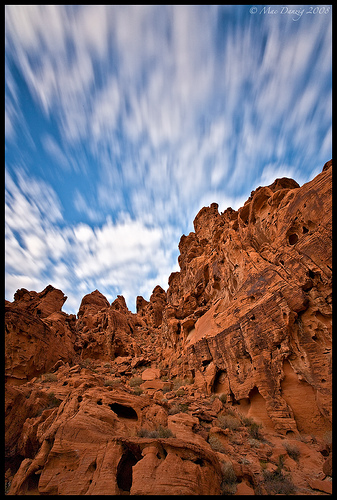
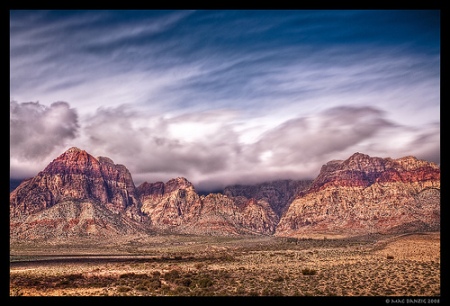
The above image is a blend of two shots…
Both were taken with a tripod within a few moments of each other. … The first was a normal shot @ F16, 1/200th of a second… The second was a long exposure of the same scene for ten seconds. I used a 10-stop ND filter to slow the shutter speed down…
I blended the two together in Photmatix and then processed the stacked shot in Lightroom.
The clouds were moving very fast this day. I really like how the long exposure blended with the normal shot… I wouldn’t have been able to keep the blue sky with just the long exposure, and I wouldn’t have the stretched clouds with the normal shot…
Thanks for reading
-Mac




You must be logged in to post a comment.