New Gallery Exhibition in Burbank, CA
Posted in Events, News with tags Bryan Konietzko, exhibit, gallery, los angeles, Mac Danzig, Michael Dimartino, photography, sale on April 7, 2011 by macdanzig
Hello, friends.
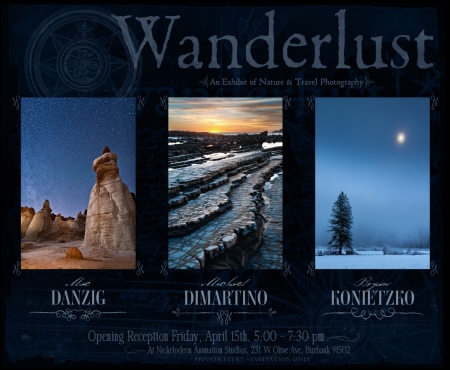
I’m happy to announce that on Friday, April 15th, photographers Bryan Konietzko, Michael Dimartino and myself will have a gallery opening at Nickelodeon Animation Studios in Burbank, California. The word “Wanderlust” defined is A German word for the irresistibly strong desire to travel. This sums up the subject matter that we will be displaying. Everything from cityscapes, to wildlife, to extremely remote landscapes will be shown by all three of us.
Although the reception is technically a “private event” I invite any of my blog readers in the area to stop by and say hi. Admission is free. Also, our art will be up for approximately 1 month here, so if you aren’t able to make the opening, there will be plenty of time to check out the gallery afterward.
I will be selling signed canvas-mounted prints of rather random subjects (though mostly natural landscapes and wildlife). Limited edition signed prints will also be available.
Thanks for looking! 🙂
-Mac
Travel Report – Silver Salmon Creek Lodge
Posted in Travel Reports with tags alaska, bears, creek, grizzly, lake clark, lodge, photography, report, silver salmon, sscl, wildlife on September 12, 2010 by macdanzigSilver Salmon Creek Lodge, Lake Clark National Park, Alaska: A photography trip report.
In July of 2009, I traveled to Alaska for an unforgettable photography excursion. Wildlife photography has been a branch of the art that always kept itself just past arm’s-reach. It is designated to those photographers who have time, patience, money, and the ability to venture into areas where truly elusive wild animals can be seen. After an excellent trip to Yellowstone National Park in 2008, I was left with the urge to capture more true wildlife photos. Grizzly Bears were one of the few indigenous species of wildlife in Yellowstone that I never got a glimpse of during my short 1-week stay, and although the trip was a huge success in many ways, I became increasingly jealous of some of my friends on Naturescapes.net and their amazing Brown Bear photos… A trip was in order.
I researched the possibilities thoroughly, and with the help of other NSN members, including Bill Lockhart, I finally made the decision to book a trip to Silver Salmon Creek Lodge in Lake Clark National Park, Alaska. Phil Colla had published a detailed travel report from the lodge, as had Bill Lockhart. One of the other options when hunting for Bear photos in Alaska was to visit the Brook’s camp in Katmai, but the thoughts of standing on a cramped viewing platform next to hordes of other photographers to get shots of Bears Salmon fishing didn’t sound as appealing as what SSCL had to offer. I had heard the reports of standing within 20 feet of the Bears, watching them interact in their natural habitat with no outside humanly distractions. This seemed like the place for me.
So I booked it. 5 months in advance. I only had a short window of time to actually take the trip, and because bookings can fill up rapidly, the advanced time was necessary. This isn’t exactly a bargain photography trip and is the most expensive one I’ve taken to date, but you get what you pay for. Really, you do. I had originally justified it as a once-in-a-lifetime trip but after one day in the field, I knew I would have to find a way to return again…
The owner of SSCL, David Coray was extremely helpful in assisting me with the booking and planning process. In the end I decided on flying into Kenai, AK via Anchorage and spending a night at one of David’s rental properties in the area. In the morning, his assistant drove me to the Soldotna Airport and I took a bush plane across the Kenai Peninsula, directly to Lake Clark National Park. There are only two ways to get to the area; by boat or by air and since there is no airport, only small craft like bush planes and float planes can land. This makes for a truly remote location that is still untouched by development. (Let’s hope it stays that way.) Bill Lockhart had told me about the flight and it definitely lived up to expectations… Truly unforgettable. We landed directly on the beach, just a few hundred yards from the lodge property where I was greeted by Jenny, my assigned Bear Guide.
The guides a SSCL are top-notch and have a true respect and understanding of the wildlife in the National Park. They also understand a great deal about photography and will always help position you in the best area for good lighting. These guides often do not carry guns and one of the main reasons for this place being bear-friendly is because of the relationship the owners and guides of SSCL have with them. The bears are left alone for the most part and treated with the utmost respect in terms of territory and comfortable viewing distance. Trash and food scraps are not left out, so the bears are not enticed into scavenging on lodge property. Large numbers of non-educated people never find their way onto this part of Lake Clark National Park, because SSCL (and their neighbors – Alaska Homestead Lodge) keep the reservation numbers to a minimum and deter the “zoo” atmosphere by educating the few visitors they do have and only hire guides who keep the bear’s safety in mind just as strongly as their clients. The land being on a National Park mean no hunting is allowed, and bears are only approached by the guides in wide open areas, such as grass fields they graze in, as well as shorelines and river outlets.
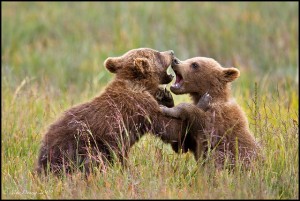
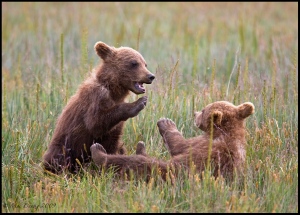
The lodge area is located just a few hundred yards from the shore, so after tossing my luggage in my cabin and getting a quick briefing on the lodge and bear-viewing etiquette, I was out in the field with Jenny in under 20 minutes and standing within 50 feet of a mother bear and her three first-year cubs. She nursed her cubs right in front of us, and afterward, two of the cubs engaged in a friendly wrestling match…
I had to take a minute, stop looking through the viewfinder, and just absorb the scene… This place really is as magical as the people who went there before me had professed. Jenny went out of her way at every location to position us where the light was optimal for photography and guiding me to approach slowly to get those great close-up shots, at the same time always giving the wildlife their space.
Throughout that first day, the light was (for the most part) excellent. We were able to catch shots three different Bear groups in three different areas before heading back to the lodge for dinner. (we skipped lunch that day and stayed in the field shooting.) I was fortunate enough to have Jenny all to myself during most of my stay and she was great company and extremely accommodating. We would see the other guests (a photo workshop group run by David Cardinal and guided by Drew – SSCL’s best guide) from time to time in the field, but there was so much room and so many photo opportunities for different bears throughout the area, that we never found ourselves crossing wires.
Transportation from the lodge to the bears (depending on where they are at the time) is either by ATV or on foot. The majority of the time, I would ride in a trailer with my gear, towed by Jenny’s ATV and she would scout out photo ops as she drove. The staff at SSCL stays on radio with each other at all times which helps avoid the possibility of driving into an area where other photographers may be quietly and cautiously working on shooting…
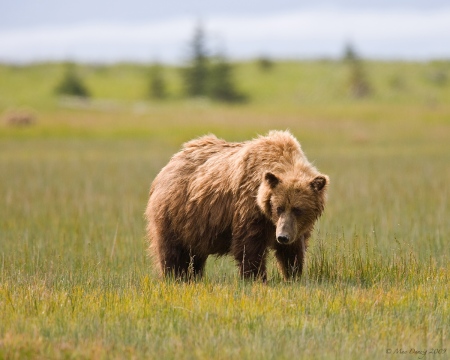
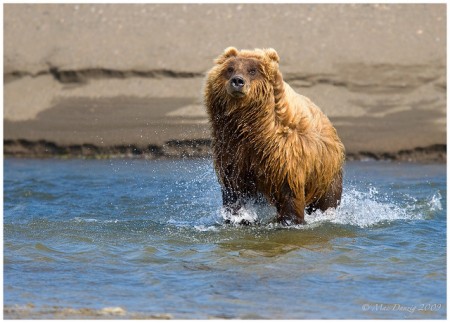
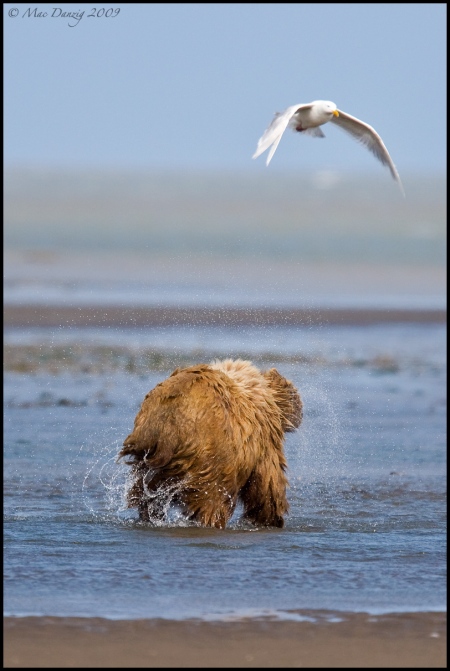
My favorite shots from the first day came from an adult sow who was taking her time, looking for fish that were stranded between a sand-bar and the shore during low tide…
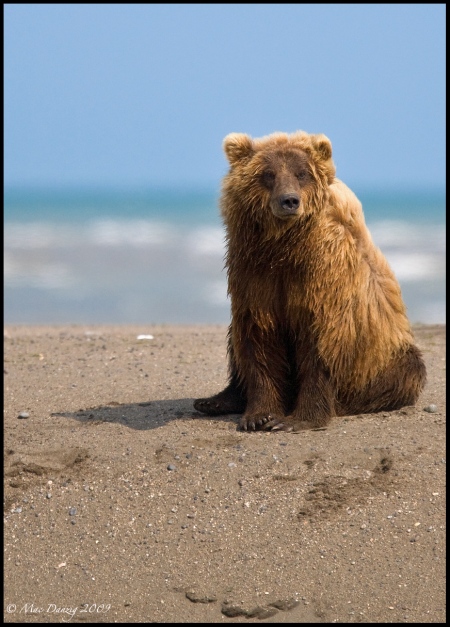
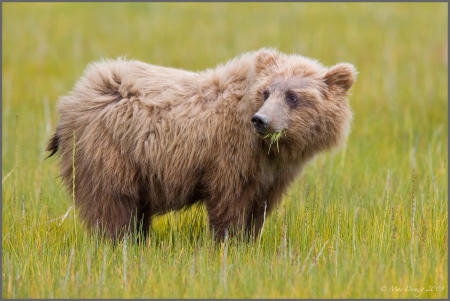
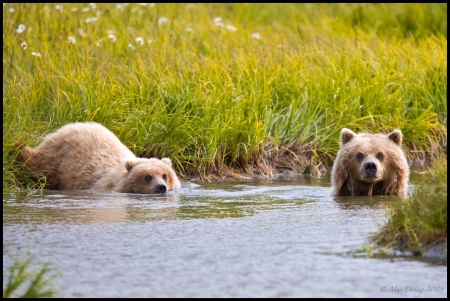
The bears in the Lake Clark National Park area are Coastal Brown Bears. One of the reasons why they are larger than their Grizzly counterparts is because of their easy access to large quantities of salmon who come in from the ocean inlet to spawn in the freshwater in the peninsula’s rivers. Most of the early spring and summer however, they spend a great deal of their time grazing on sedge grass in the meadows just in from the coastline.
On day two we lost the good light, but an amazing adventure that day definitely changed things for the better. As luck would have it, I happened to be the only solo visitor to the lodge at that particular time… The other 6 photographers there were part of a workshop being conducted by David Cardinal. Part of their itinerary included a 90-minute boat ride to Chisik Island and Duck Island, located in the Tuxedni National Wildlife Refuge area. Since there was extra room and only one of me, I was graciously invited to come along on this journey, which ended up being unforgettable.
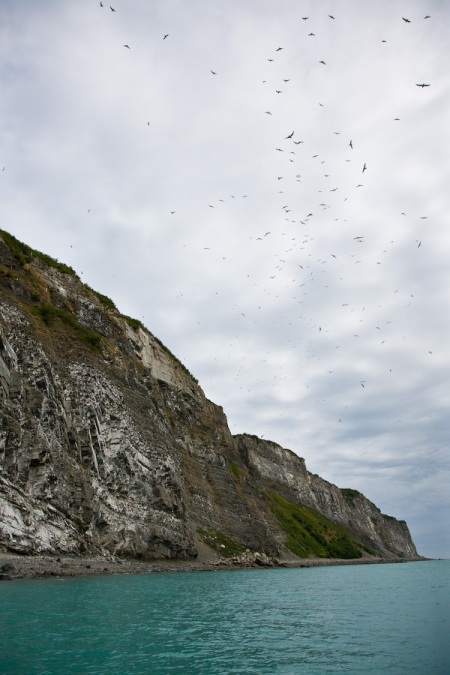
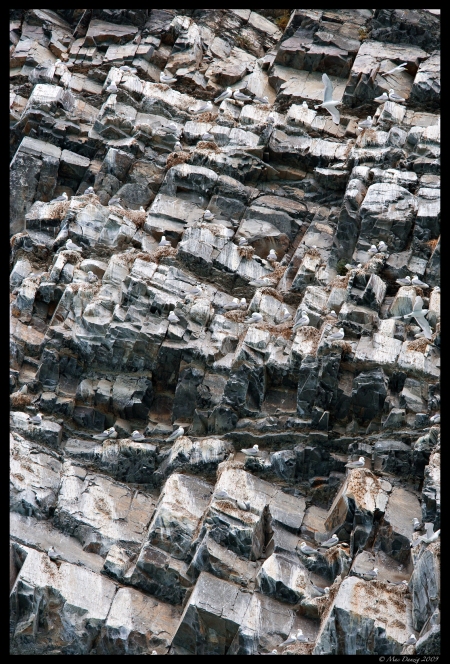
As we left the coast on David’s boat, we crossed over a strongly-defined line of change in water color. This is from the volcanic ash deposits that flow freely from Mt. Redoubt and is cast out directly into the saltwater peninsula… After about 30 mins of rough, choppy waves that bounced us all over, the water calmed and we headed toward the cliffs of Chisik island, where thousands of Kittiwakes nest. As we floated closer, there was a cacophony of fleeing bird calls that became almost deafening.
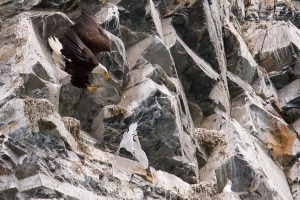
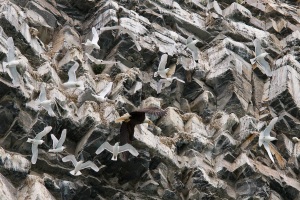
After a few moments, I realized that there was a large Bald Eagle soaring close by the nests and as soon as I put my telephoto lens on, he began to attack. Some of the Kittiwakes attempted to attack the Eagle, while others flew for their lives in a scattered, unorganized panic. Unfortunately, 300mm was not a long enough reach to capture the action of this Eagle’s failed attempts at hunting on this afternoon, but luckily I was able to at least obtain some documentation to help me remember this amazing moment.
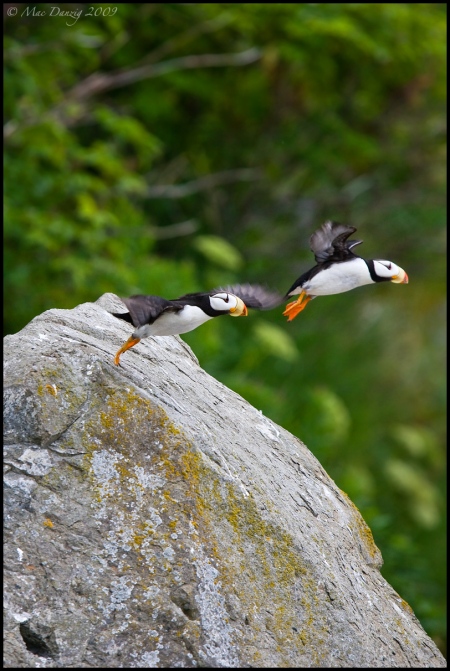
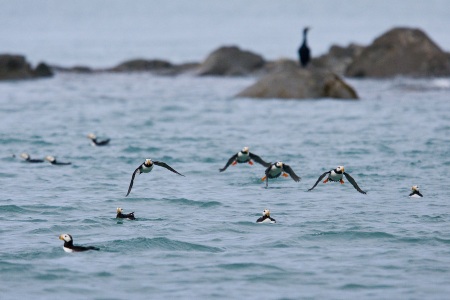
Traveling on to Duck Island, just north of Chisik, we dropped anchor and spent a few hours photographing Horned Puffins. These birds have been one of my favorite species since I was a young child, so getting the opportunity to photograph them was worth the trip to Alaska alone.
The third and fourth days were mostly a wash-out, but my guide Jenny and I still went out in the rain and did our best to photograph the Bears within a few square miles of the lodge. I also took the opportunity to spend some time socializing with the group taking David Cardinal’s workshop (who happened to be all wonderful and intelligent people) and eating the amazing food that they prepared for us… I was incredibly lucky to have Dorian (David Coray’s daughter) there in addition to the resident chefs. Dorian was incredibly knowledgeable about the Vegan diet and went out of her way to make me the most amazing vegan dishes and deserts. I am not kidding, it was like Thanksgiving Dinner for breakfast, lunch and dinner – every day. I have never eaten that much good food in my life.
On my last day, I was scheduled to leave around 1pm, so Jenny and I headed out at dawn to photograph the bears digging for clams at low tide… Experiencing low tide is rather surreal, considering there is all of the sudden, a huge expanse (up to a mile) of barren shoreline (almost like a wet desert plain) where just a day before, there was deep ocean water and breaking waves…
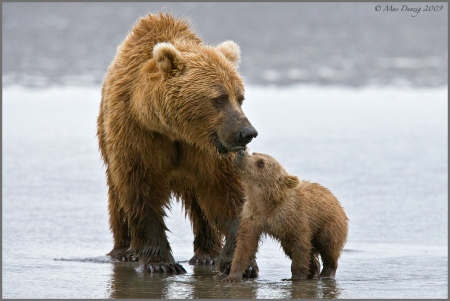
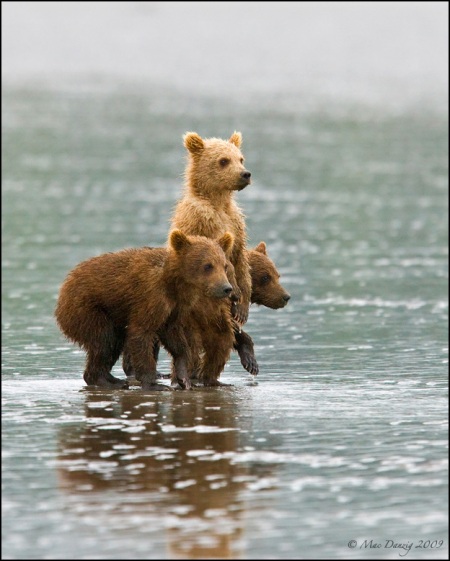
As luck would have it, nature gave us a gift and the Mother of the three first-year cubs took them out onto the low-tide flats for what looked like possibly the first time. I was able to capture two photos that both ended up being contest-winners eventually. One is of the three bear cubs hesitating curiously as their mother ventured out into the shore. The other is of the same mother sharing a brief intimate moment with one of the cubs…
All in all, it was a hugely successful trip. Not only from the photographic point of view, but also from the ‘life-experience’ perspective. I try not to over-indulge in life, but I think I’d be cheating myself if I didn’t go back again soon…
I am already thinking about summer 2011!
thanks for reading
-Mac
The End.
“Reflection” – A Gallery opening in LA featuring my work.
Posted in Events on April 21, 2010 by macdanzigHi everyone. – Some of my work will be on display for viewing and print sales for one week at the Coppola Art Exchange in Beverly Hills, CA.
I am showing this gallery in conjunction with fellow MMA fighter, Chad George who is an art major from the Art Institute of California – Los Angeles, specializing in ink drawings and sculptures, which he will be showing along side my photography. The opening night is May 15th and will include festivities, a live DJ and free Wine.
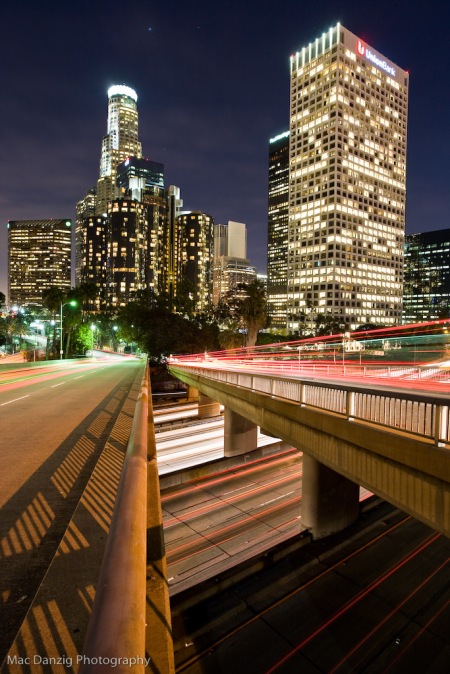
My theme for the gallery is night photography and I will be displaying two sections – one with urban night time shots, and another section for long exposure star trails…
If you’re in the LA area on the 15th, please stop by and have a look. See you there!
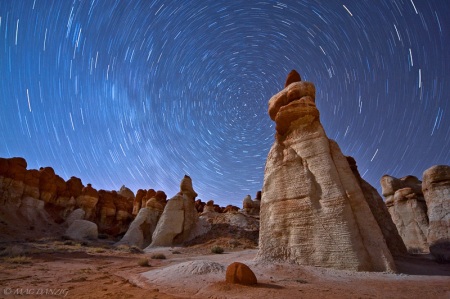
Featured Photo – Blue Canyon Star Trails
Posted in Featured Photos with tags Arizona, az, blue canyon, landscape, long exposure, night, rock formations, star trails, stars on April 18, 2010 by macdanzigTechnical Data:
Camera: Canon 1Ds MkIII
Lens: Canon EF 17mm TS-E
Aperture: f/4
Exposure: 1357 seconds (approx 22 min)
ISO: 200
About the photograph:
“Blue Canyon” is another one of the amazing and remote gems in the Southwest that has an incredible array of rock formations which are extremely delicate. The name is a bit of a misnomer, as there isn’t anything “blue” about it. During the same photography trip that eventually included White Pockets, my good friend and I headed to this, another part of Arizona seldom seen. With some extremely helpful information from a great local photographer, we easily found this canyon after a few hours of driving through the highways and back roads of Arizona. – Just in time for sunset. Unfortunately, the sky was flat and boring, just as it was during much of that week in the Southwest. Fortunately for me, my friend is a night time long-exposure fanatic like I am, so we hung out for about 90 minutes after dusk and began composing some star trail shots… Like I often do with star trails, I located Polaris (the north star) and composed my foreground to work with it, thus creating a spiral-like effect over the long exposure.
Normally, I like to shoot star trails under a new moon (that’s no moon at all) or at least during a time when something less than a half-moon has already set below the horizon. This helps me achieve a very long exposure time without the sky getting blown-out or overexposed… This time, I shot under a 25% moon which was really great because there was no need to light-paint with an artificial source. At the same time, I was restricted to a sub-30 minute exposure, but as I am learning- the need to expose for an extremely long time isn’t as important as the other elements involved in capturing a perfect star trail shot. The longer trails from 1 or 2-hour long shots aren’t even always that aesthetically pleasing, in my opinion.
While we were there, I also took some moonscape shots with higher ISOs. I will be posting some of them soon. In the end, I was very happy with the way this shot turned out. The need for post-processing was very minimal as well.
One thing I must touch on again is how incredibly delicate these structures are. This isn’t a place that will hold up to many human visits and because of that, I am not ever going to publish directions to this area. Unfortunately someone eventually will, and unless the local Navajo council (which governs the land that Blue Canyon is on) does something to regulate visits, we may see a similar situation as what happened in Fantasy Canyon in 2006. For now, the remoteness of the area and relatively unknown terrain will keep most people away. But if you do go there, please watch where you step and tread lightly. This will help ensure the physical preservation of this magical area for future visits.
Thanks for looking
-Mac
Photography Excursion – White Pocket, Arizona
Posted in Travel Reports with tags Arizona, buttes, canyon, coyote, paria, photography, pocket, southwest, utah, vermilion, white, white pockets on March 30, 2010 by macdanzigPhoto Trip Report of ‘White Pocket’ located in the Paria Canyon – Vermilion Cliffs Wilderness area.
I believe that in order for person to find their true calling, (no matter what that calling is) they must first set out on the path that separates ego from the equation. There are a many ways of creating this phenomena, but the main goal should be the complete removal of the stain of current human culture. This is not a modern dilemma. This is what man must deal with as he continues to draw himself farther away from the natural world he emerged from. For my own body, in particular, putting myself in the atmosphere of a timeless place, untouched by human manipulation, is the best ticket there is…
Remote locations that few people venture to here in the Southwest seem to have a magnetic quality for me. Add to that a beautiful, bizarre and other-worldly landscape, and I’m planning the trip already.
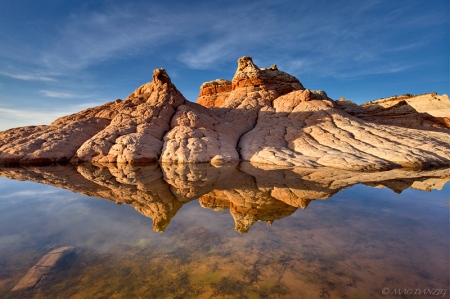
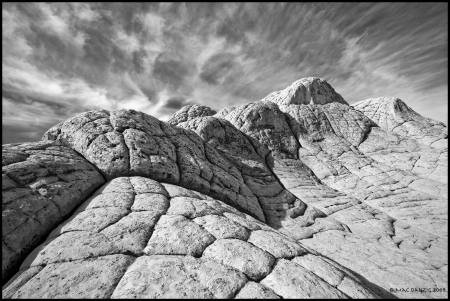
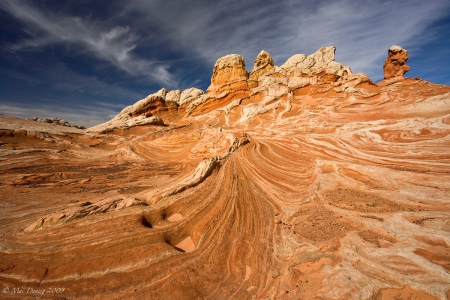
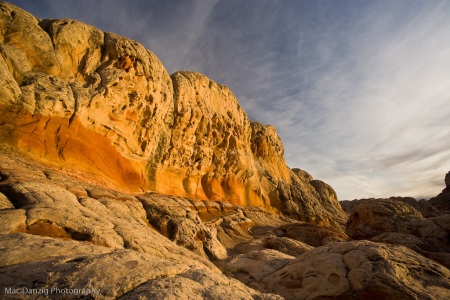
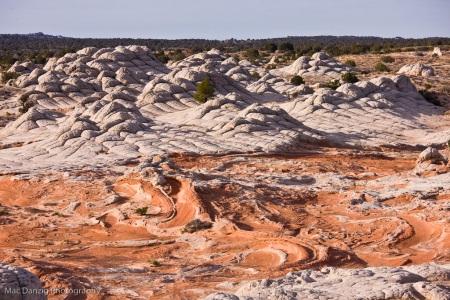
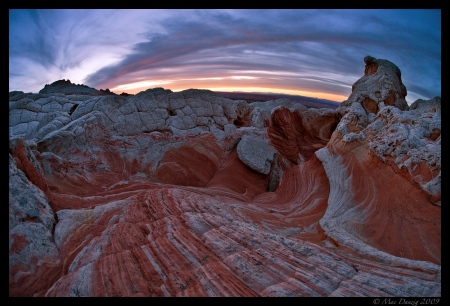
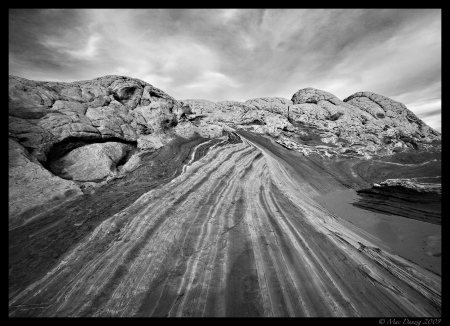
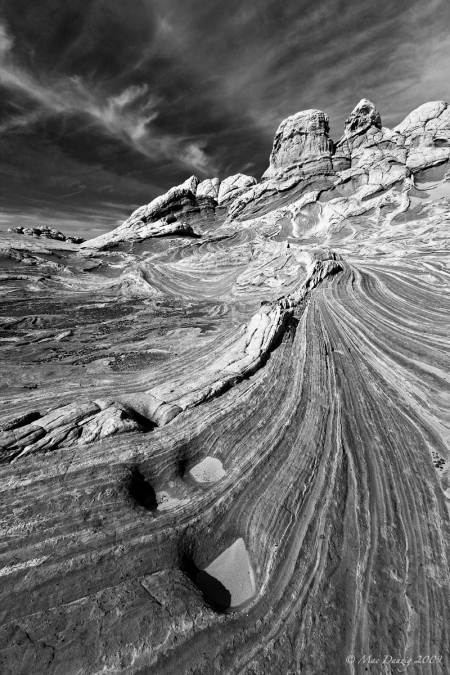
The area known simply as ‘the White Pocket’ in northern Arizona fits that bill perfectly. Just 6 miles east of Coyote Buttes South, (another gorgeous and remote location itself) White Pocket contains some of the most astonishing geology you will ever find anywhere on earth. Like Coyote Buttes South, most of the formations are layered sandstone, made from different generations of sand dunes deposited hundreds of millions of years ago during the Jurassic period. Geologists say that every time a new layer of dunes was blown onto an existing layer, the ones beneath it were compressed and hardened by groundwater minerals. These crossbeds often have different colors because the mineral deposits in the groundwater (sometimes rich in iron) varied from generation to generation… The formations at the White Pocket are distinctly different from the ones you’ll see at Coyote Buttes because much of the top layer is as the name states: ‘white’. This is because the last generation of sand that solidified over the white pocket area was rich in silt.
All of that gives a fair idea of the basis behind how these formations came to be, but the truth is, nobody really knows exactly how the formations here came to take on such a chaotic appearance. There are abundant signs of soft-sediment deformation, but in ways that aren’t normal. I am obviously not a geologist, but I’ve heard theories of earthquakes, floods and volcanic action during the sedimentation process… If any of that means anything to you, that’s great. If not, that’s ok too, because visual stimulation is something anyone should be able to enjoy, regardless of your interest in geology. Although I’d have to admit that this landscape may be too chaotic and random for some people’s taste.
Supposedly the area was named by cowboys and ranchers who settled the land in the late 1800s and early 1900s. ‘Pockets’ generally referred to areas of hard rock in the desert where rainwater would collect. Cattle still roam somewhat freely in the Pariah Canyon wilderness and the white pocket is still used as a water source by many animals traveling the sands from Autumn to Spring. In the middle of the formations there is still the remnants of an old dam wall built by ranchers to help keep more water contained.
The formations here lack the perfect symmetry that has made “the Wave” in North Coyote Buttes so famous. And because of that, it is much harder to photograph. You can spend days here (trust me I know firsthand) and not even come close to capturing the pure cacophony of swirling rock the way your eye saw it. I would need a week here to even begin to do this place justice photographically, and as I write this I am realizing that words do very little to explain the feeling you get when standing in the midst of these ancient monsters.
To me, there is something very special about desert areas with aesthetic appeal that also see very few human visitors. The silence is deafening. The environment unpredictable and inhospitable. That is what attracts me to places like this rather than the better-known parks. Take for example Zion National Park: It is one of the most beautiful places on earth, but unless you’re there during winter, you’ll be constantly rubbing elbows with fellow photographers, hikers, old ladies with disposable cameras (flashes on all the time), soccer moms, baseball dads, nature nuts, confused city folks, tourists of all kinds, bikers, and whining children who just want to go home and play Xbox (among others). Now don’t get me wrong, I like the company of other people as much as the next misanthrope, but you have to admit there’s something stripped away from the feeling of a wilderness area when it’s been turned into an outdoor mall… You’ll get none of that in White Pocket or Coyote Buttes South. There are no main roads that join landmarks together, no overlooks and no nearby lodging. This is why I seek these sorts of places out. And unfortunately that’s why they are becoming more and more popular every year. I shouldn’t complain since I am part of the problem: photographing the place and blogging about it. But in the tradition of being an American citizen, I’ll go ahead and complain anyway.
Getting there isn’t easy. In fact, it can be completely impossible if you don’t have a vehicle with high clearance and a good 4wd or Awd system. The closest towns to this area are Page, Arizona to the east and Kanab, Utah to the west. Both of these “cities” could be considered “in the middle of nowhere” to many people as it is, but then there’s the venture from one of those towns (take Page for example) to the White Pocket itself which includes 35 miles on a 2 lane highway, followed by 20 miles on a rutted-out one lane dirt road and finishing up with a 15-mile plow through the driest, deepest sandy back roads you’ll probably ever encounter. I won’t publish directions, but as the old saying goes -‘seek and ye shall find’. There are plenty of detailed directions to the White Pocket if you’re willing to do a web search.
Another thing that’s a plus about White Pocket is the fact that you don’t need a permit to legally go there, unlike Coyote Buttes North and South. This makes planning your trip a little bit easier. Those wishing to legally obtain a permit for Coyote Buttes (North especially) have to jump through a series of hoops which is honestly a good thing in my opinion, because it keeps the hordes of tourists away. With White Pocket, the last 10 miles of “road” are the hoops you have to jump through and that itself will discourage a lot of people. Still, on my last visit, there were two other parties camping there besides mine, and an average of 3 to 4 vehicles a day came through for day-hikes. The good thing is that most likely anyone you run into out there is going to be a decent person. Most people visiting are serious photographers or nature enthusiasts/adventurists. There is a feeling that the BLM may have to start issuing a permit system for the White Pocket in the future. Only time will tell.
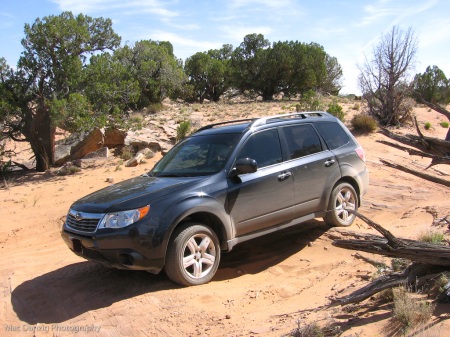
If you’re going to visit the White Pocket or Coyote Buttes South, you are going to be driving through some very deep sand. Don’t even bother trying to get there in a passenger car. You can get to the Coyote Buttes North trailhead in a small car, but you won’t make it to White Pocket. I suggest bringing an air compressor and deflating your tires to around 18-20 psi. This will help your vehicle glide over the sand a little better. Use the air compressor to bring your tires back to normal psi when you return from the sandy roads. A shovel is a must in case you get stuck. The most difficult thing about these deep sand roads is that there are abrupt patches of extremely sharp, uneven rock here and there throughout the trip. In order to get through the deep sand you need to keep up your momentum because without traction, you will get stuck in the sand if your vehicle stops. – But in order to get through the rocky parts of the road without blowing a tire (like I did this last trip) or bottoming out and damaging something crucial underneath, you have to slow to a crawl… This means you have to keep your eyes open at all times and be ready to quickly slow down when the sand turns to a stairway of sharp rock. This can be very nerve-racking (or very fun, depending on how you look at it.) I drive an 09 Subaru Forester which is an underrated and very capable off-road machine. It has gotten me there and back twice now, but I have seen more than a couple pictures of American 4×4 trucks stuck in the deep Paria Sand.
Another thing to consider is bringing some extra floor mats or strips of old carpet in case you do get stuck… These can be tied to your rear forks so that you can keep going through the deep sand once you get going again, without having to stop to pick them up and risk getting stuck again. The hardest part of the drive is coming back from the White Pocket, about 2 miles from it- A steep winding hill that you will go down in order to get there. The main difficulty is that at the bottom of this hill, there’s an old dry creek rut that makes gaining momentum for the hill impossible. But chances are that if you got there, you will make it back- no problem. Obviously, there’s no cell phone service out there, so keep that in mind when planning.
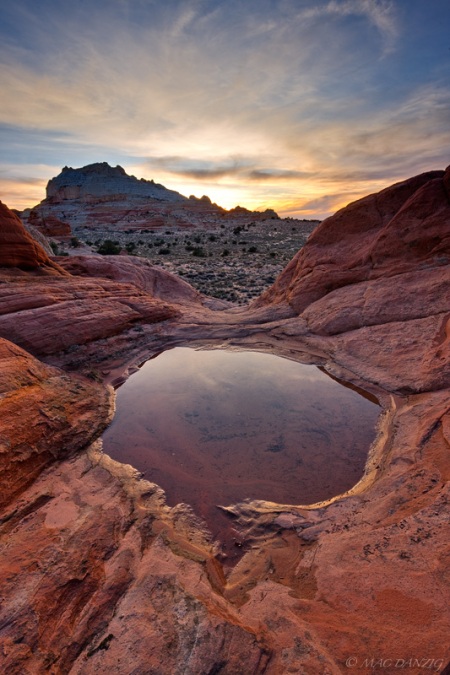
As stated before, photographing this place is not easy. There are so many twists, turns, peaks, valleys, and utterly strange shapes here that it’s hard to make a traditional landscape or abstract composition work. This forces you to think outside the box photographically. Like most landscapes, early morning and evening offer the best light. If you go between October and March, you may be lucky enough to have pools of water to photograph as well. On my most recent visit, I spent my time in the hard mid-day light exploring the surrounding area. This was an excellent exercise which only left me yearning for more exploration. I was able to hike up to the highest point in the general area – just east of the White Pocket, and take This Panorama of the landscape from atop a huge sandstone cliff. Although not a technically great shot, it’s unique and pretty interesting as it shows a seldom-seen view of this location, looking down onto the White Pocket from above. I have made some ‘snapshots’ that work with the interface of the Gigapan site so that you can get a better idea of how the landscape is spread out.
When you look at the broad landscape from any high vantage point in the White Pocket, you will see Coyote Buttes North, Buckskin Gulch, and countless unnamed and largely unphotographed rock formations tossed throughout the Paria Plateau. This scene makes me want to spend a few weeks backpacking in the area, simply exploring – photography being secondary. One thing to remember is how extremely delicate the terrain here is. Please be careful where you tread. A misplaced foot can crumble a formation that took millions of years to form.
White Pocket is one of those places that leaves you wanting more… When the light was poor, I found myself simply enjoying the scenery and the immortal feeling of this remote place. So much time (hundreds of millions of years) has gone into creating this place and it’s a privilege to be able to enjoy it in this relatively untainted state without the rush of a highway buzzing in the distance or any other man-made distractions. Places like this still exist in the United States and I suggest going there and experiencing it for yourself if you’re anything like me. Just don’t forget your camera and plenty of water… As for me, I’m already scheming on when I can steal away and get back out there…
Thanks for reading
-Mac
PS,
Here are a few related links you may find worthwhile:
The original Synnatschke blog post from ’05 that still contains some of the best info on this place.
Photographing Arizona blog entry on White Pocket and Coyote Buttes South.
A Panorama I took from high on a eastern cliff of the White Pockets and surrounding area.
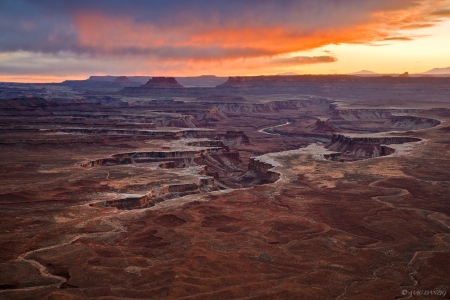
Featured Photo – Green River Sunset – Canyonlands
Posted in Featured Photos with tags canyonlands, featured, green river, island in the sky, photo, sunset, utah on March 17, 2010 by macdanzigTechnical Data:
Camera: Canon 1Ds MkII
Lens: 24-105mm f/4 L at 45mm
Aperture: f/11
ISO: 100
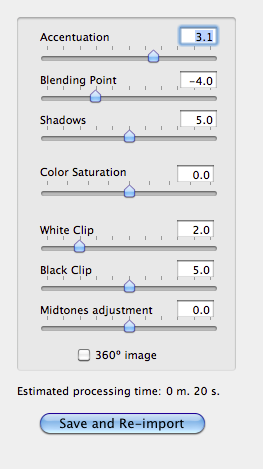
Post Processing: 3 images blended using “Exposure Fusion” in Photomatix Pro. Adobe CS4 for finishing adjustments.
About:
This is one of those photos that really reminds me of the place and time in which it was taken – and evokes the same feeling as when I took it…. Canyonlands National Park in Utah is one of my favorite places on earth. It sees far less visitors every year than it’s sister, Arches National Park and for my money is probably the second most amazing large area (geologically speaking) in the southwest.
The evening I shot this, I was originally planning on going to Dead Horse Point for sunset, but some Japanese large-format photographers I met up with at False Kiva that day convinced me to go to the Green River overlook instead. I’m glad they did. There was a storm off in the distance looking westward and just after the sun set, an afterglow lit up the rain clouds.
Standing at the edge of the cliff in the ‘Island in the Sky’ district that overlooks the Green River and White Rim road, you are 1500 feet above the foreground you see in the photo. This kind of height almost lends itself to an ‘aerial’ sort of feel.
It took me a long time to finally get to this one in my back catalog and I’m not sure why, but I’m fairly certain it has something to do with the fact that I am a procrastinator when it comes to processing bracketed exposures… For the processing, I used Photomatix’s ‘exposure fusion’ algorithm, rather than ‘merge to HDR’… Darwin Wiggett first told me about exposure fusion not too long ago and I love the results when compared to making HDRs, which depending on the scene, can often look garish and unnatural no matter how much time you put into them.
Here is what my settings looked like for the three bracketed exposures that I blended.
I then sent it to CS4 and did some levels adjustments, as well as a subtle Selective Color layer and sharpening.
thanks for looking
-Mac
Photography Excursion – The Canadian Rockies
Posted in Travel Reports with tags alberta, banff, canada, darwin wiggett, photography, rocky mountains, winter on February 22, 2010 by macdanzigPhotographing the Rocky Mountains in Alberta, Canada
Well, I haven’t been keeping up with the blog as usual and I suppose this is where most bloggers throw out some hollow apology, followed by a personal excuse for their absence, as if the world were to completely halt without their ramblings… Well, you’ll get neither from me. I know how much impact my web log has on the world and I’m not delusional about it… Recently have been working and also doing what I love, and that’s taking photos and exploring the outdoors. This time, it has been in an extraordinary location: The Canadian Rockies.
A few photography friends and I spent a week up there, during which time we also attended a 3-day photo tour run by Darwin Wiggett. Darwin knows the terrain up there like no one else and showed us some of the best locations for great photographs. Since my time is limited at the moment, the following is simply a quick summary of the trip with a few accompanying photos I took…
After a night in Canmore, we made our way north, up through Banff and Lake Louise, finally arriving at the Aurum Lodge which is just 40 kilometers east of Banff National Park. The lodge is run by Alan Ernst and his wife Madeleine. If anyone knows the area as well as Darwin does, it’s Alan. And he has a ridiculously good collection of photos from around the area to prove it.
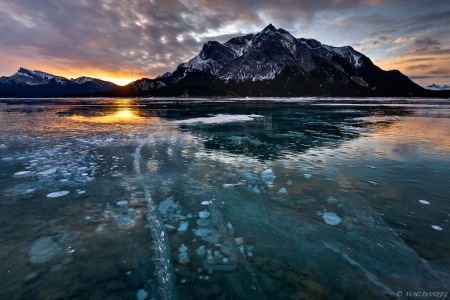
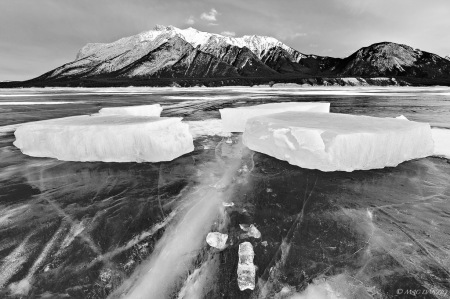
The Aurum lodge sits right along Abraham Lake, (which is frozen over in the winter) and is in a perfect location for photographers. It’s no wonder that Darwin and other great nature photographers choose to stay here when photographing the area or running workshops…
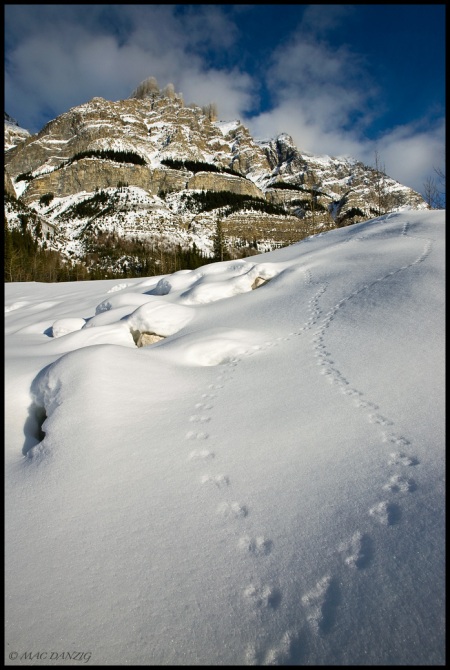
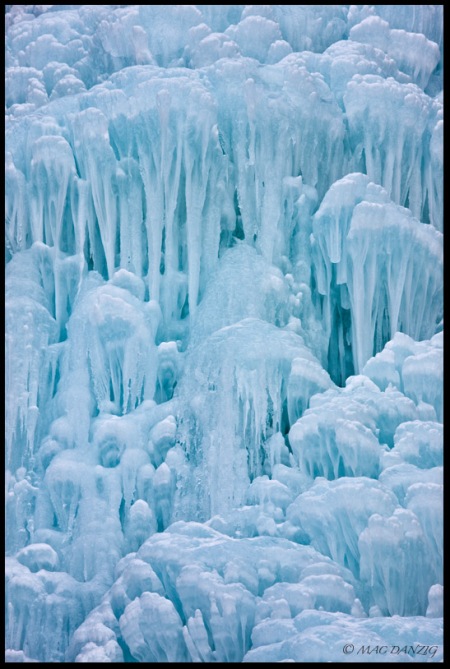
Throughout the next few days, we spent every moment of daylight- from dawn to dusk, out in the field shooting or hiking to different locations. This was definitely my kind of trip. Darwin and Alan took us to some really incredible locations including frozen waterfalls, snow-covered mountains, glaciers and of course all of the flat frozen bodies of water with many different Canadian Rocky peaks in the background. The average temperature was around the 30 degree range (Fahrenheit). We were told that even with the occasional harsh windchill, it was unseasonably warm in comparison to previous years at the same time. I stayed comfortably warm simply by dressing in layers with a light windbreaker on top. Crampons or ice-cleats are a must and I found StabilIcers to be very functional for the price.
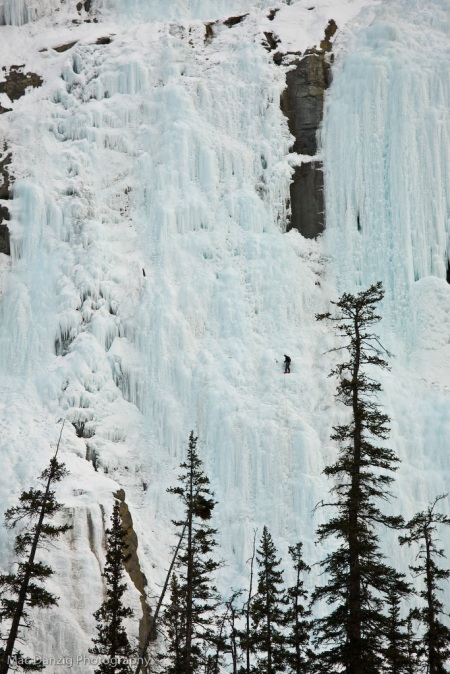
The extreme lack of tourists due to the remote location and cold weather was a welcome change from my springtime photo excursions in the Southwest… The only other people we encountered most of the time were ice-climbers. These people are crazy, but in a good way. I couldn’t believe some of the sheer ice cliffs these guys were scaling. It was great to witness, but I doubt I’ll be trying my hand at vertical ice climbing anytime soon.
Driving through the Icefields Parkway is a humbling experience. As the road winds through the forest of mountains, you are completely surrounded. Everywhere you look, there is a gigantic peak piercing the sky.
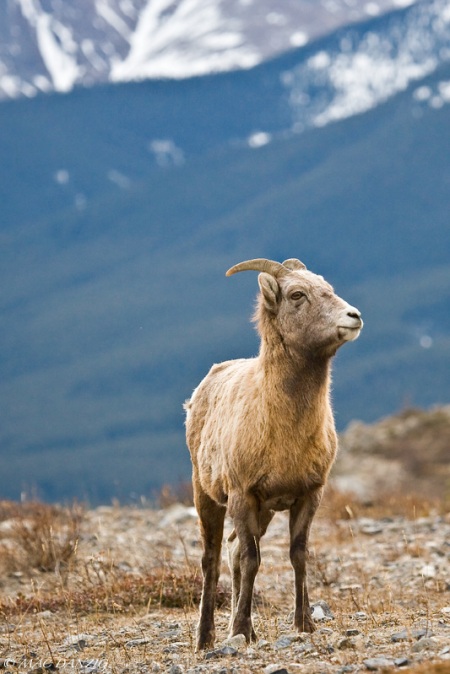
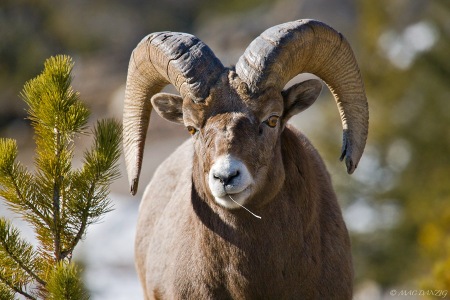
As far as wildlife goes, I had three excellent photo ops with Bighorn Sheep. I had never gotten a good shot of this animal prior to this trip, so whenever we came across a herd, I spent my time photographing them, while most of the others continued working on their landscape shots…
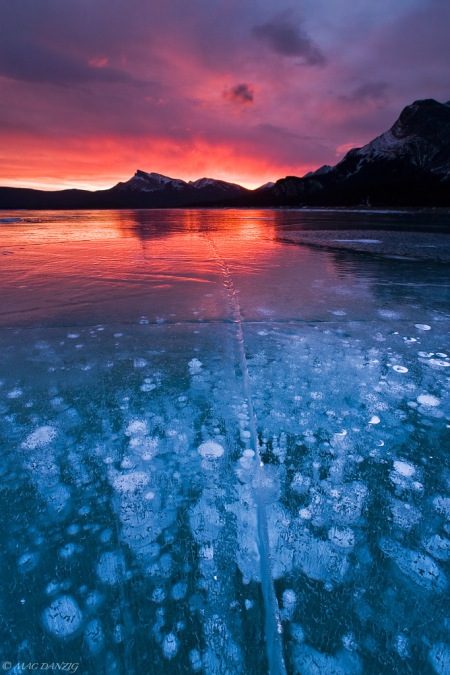
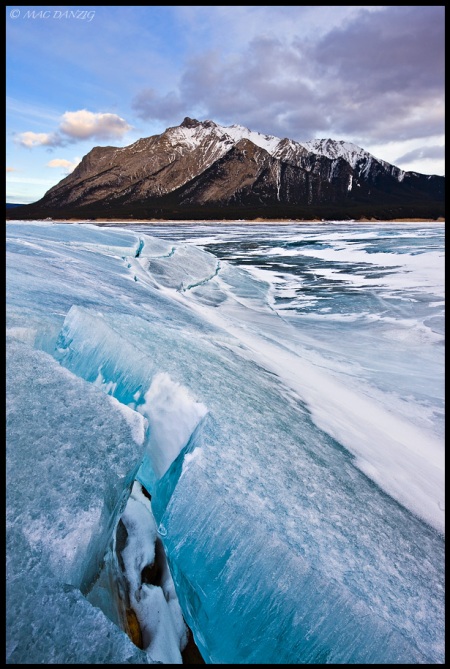
On the third morning, we went to Abraham Lake for the second time and were treated to the most spectacular natural colors I have ever seen during a sunrise. Everyone wandered carefully out onto the lake and found their own bit of foreground to prepare for the sunrise. The lake is frozen solid in some places, but further out into the center, you can see the water below about 1 to 3 feet of ice. There are bubbles, cracks and all sorts of amazing natural textures to use as foreground during these winter months. Luckily for us, the fire in the sky hung around for a good 10 minutes, which was more than enough time to obtain some keepers. When I viewed the files in the raw converter, untouched, they appeared almost over-saturated. That is how intense the color was. I actually ended up having to de-saturate the colors when processing the photos from that morning, due to the fact that digital files just can’t handle those intense reds the way film can…
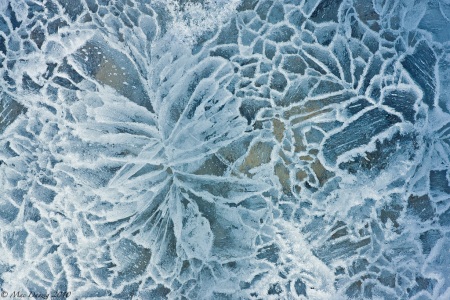
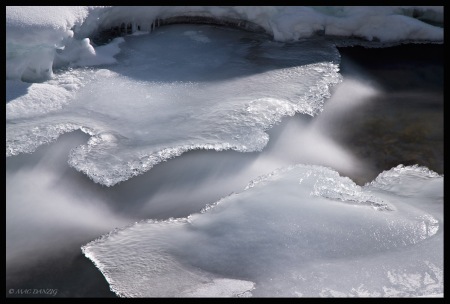
One thing that I made a conscious effort to do on this trip was look for new types of composition and focus a little more on abstract views of nature and textures. Darwin and Alan are masters at this kind of shooting and being around them helped out a lot when it came to opening my mind to some great shots that I would normally walk right by (or over)… The Canadian Rockies are so beautiful and the landscape so dynamic, that it’s easy to forget to shoot with anything other than your wide-angle lens. But many times when the light was harsh and the sun was high in the sky, I would put my macro lens on and simply start paying more attention to the ice beneath me. I’m glad I did. So many great ice textures and tiny subtle scenes would have been lost if I hadn’t decided to open my mind to different types of composition.
During our last evening at the lodge, we were met with the company of Royce Howland and David Clapp. They were just beginning their stay at the lodge on a 2-week-long photo expedition of their own. Both of these guys are great talents and I personally feel they are among the very best landscape photographers out there today. It was great to have an evening discussing (and sometimes hilariously criticizing the hell out of) the many facets which make up the present-day photography industry. Clapp has got to be one of the funniest Englishmen I’ve ever met, and that’s saying a lot. After a few hours of good conversation and red wine, it was time to pack it in, as tomorrow would be our last morning in the area.
Making our way back to Canmore, we stopped at a few different spots including Mistaya Canyon. While there, I kept my eye for the details working, rather than trying to capture the entire scene. In the end, I got a few shots I was happy with, using a 10-stop ND filter to slow my shutter speed down to 30 seconds…
This was such an excellent trip, we all agreed to come back sometime in the near future. I particularly enjoyed the fact that everyone in the group was there to take photos and have a good time, rather than the tourist types who get bored and whine about the cold… That, and it was insanely beautiful up there.
Here’s a list of links related to this article that you might find interesting:
More of my photos from this Canadian Rockies trip (as I post them)
6 favorites from each of the tour attendees (including myself)
Bryan Konietzko’s photos from this trip
Michael Dimartino’s photos from this trip
Thanks for reading and looking…
-Mac
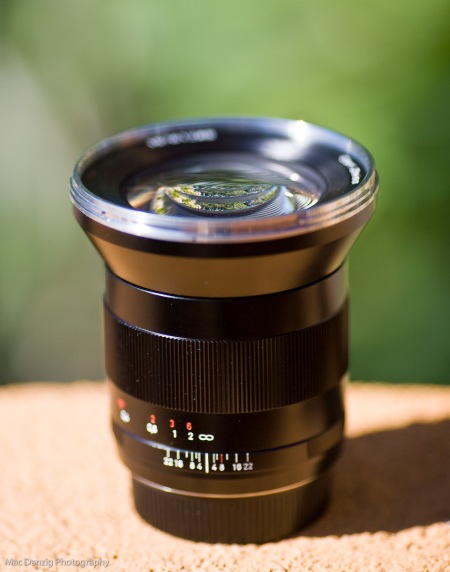
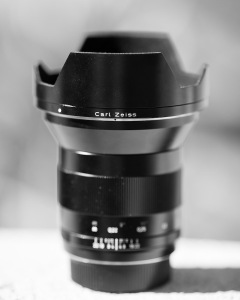
Zeiss 21mm Distagon ZE Review
Posted in Equipment Reviews with tags 17-40, 21mm, canon, distagon, lens, review, test, TS-E, Zeiss on February 4, 2010 by macdanzigA detailed look at the Zeiss Distagon 21mm f/2.8 ZE lens
Well, it’s been a while since my review of the Zeiss 18mm ZE and since then, the good people at Zeiss Micro imaging graciously let me have a good, long-term extensive loan of the 21mm lens in EOS mount.
I will start out by cutting to the chase: This is a brilliant piece of optical equipment. It is capable of producing excellent images with today’s cameras under all sorts of different conditions and I do recommend it. However, the $1700 price tag is steep, and with the versatile bargain-ish lenses out there today like Canon’s 17-40L producing pretty good results, we all want to know how this legendary 21mm lens stacks up… People expect a lot out of Zeiss products, and they should. Hopefully the following review can help you decide if this lens is for you.
When I reviewed the Zeiss 18mm, many people ended up pointing out the fact that the 21mm is Zeiss’ best ultra-wide lens and that if you truly wanted to give the 17mm TS-E a run for it’s money in the optics department, you’d have to use it, not the 18mm. So, this ended up being a great opportunity for me to test the best against the best. I personally like to be able to make extremely large prints of my landscape photos and although today’s DSLR sensors help me achieve that, the UWA lens lineup (especially for Canon) has been lacking in quality when the pixels are really pushed to the limit… The TS-E 17mm has proved to be a real champion, but filters (even hand-held GNDs) are an impossibility, as I’ll show later in this review, and although it does a great job at reducing flare, that gigantic front bulb catches stray light from all angles. Is there an alternative?
I know, I know, you’ve heard this from me before. Well now is the time for all of us gear geeks to get our pixel-peeping on and decide what spend our hard-earned cash on.
Build Quality/ Construction/Functionality
Should I even bother to mention it? Those of you who own a Zeiss already know. Those who don’t should at least get your hands on one just once so you can tell the difference. The 21mm ZE is just like the 18mm ZE, only heavier and with a longer barrel. They are both equally the best-constructed wide angle lenses that I’ve ever used, period. The hood that comes with it is metal and locks in place the way it’s supposed to. The manual focus ring works with a level of precision that’s second-to-none, unlike most of the AF lenses out there who’s focus rings are loose and slide from end to end with so much as a finger-brush. All-metal and glass, it’s built like a tank. It’s heavy for a wide-angle at 23oz, but it’s still lighter than the TS-E, which is 29oz. Honestly, if you’re one of those people who can’t handle a a few extra ounces on a wide-angle lens then you should probably just pick yourself up a point-and-shoot and call it a day… (Sorry, but I have no sympathy for the weight-whiners.)
The front-filter thread is 82mm, same as the 18mm ZE. Although the 82mm filters can be pricier and harder to find than the other sizes, this really helps with vignetting, as you’ll see…
Manual focusing only, like all Zeiss lenses. One thing I like is the fact that infinity focus is achieved with the ring pulled all the way to the right. If you know you are focusing at infinity, just turn it until it stops… One thing to be aware of when dealing with a manual lens who’s optics are this incredibly sharp (just like the 17mm TS-E) is the fact that when you are dealing with anything closer than infinity focus, the in-camera focus confirmation may hit even when the lens hasn’t quite reached true focus. Live-view, like on the 1Ds Mk III can be an essential part of getting your focus exact, rather than relying on your camera to beep or illuminate it’s focus point…
Bokeh & Close-up work
Many of the lenses in the Zeiss lineup are highly touted for their “3-D look” when used at wider apertures on nearby subjects. The 21mm definitely brings that to the table…
Of course, this isn’t a macro lens, and no photographer in their right mind should try to use it as such, but with a maximum aperture of f/2.8 and a minimum focusing distance of 0.22 meters (about 8.5 inches) you can get some great effects that other ultra wide angle lenses out there can never reproduce.
After shooting some with this lens close-up and seeing minimal distortion, I do think that some talented people could definitely utilize this lens for creative portraiture. The bokeh is excellent for this focal range. Close subjects can definitely be isolated when shooting wide-open.
Colors and Contrast
After using this lens and testing it up to some others in my arsenal, I have to say that it reproduces by far the richest colors and contrast straight out of the camera.
Below are two shots of the same exact scene, shot at ISO 400, seconds apart under the same exact lighting conditions with the camera tripod mounted. The first is with the Canon 17mm TS-E and the second below it is with the Zeiss 21mm. They were both converted to jpegs with the same exact default raw settings (no sharpening, contrast, saturation or any other adjustments) and they both had the same white balance and tint….
Feel free to click on each photo to see the full sized jpeg as well…
As you can see, there is a huge difference in colors and contrast straight out of the camera.
Using filters:
I ended up being pretty impressed with the Zeiss’ ability to avoid strong vignetting with a polarizer attached. Below are a few examples of using a polarizer outdoors:
Example 1:
Example 2:
In comparison to the 17mm TS-E, an aspect that is appealing to me about the Zeiss is the ability to use graduated neutral density filters. The Zeiss takes front filters very well. When I try to use GNDs handheld with the TSE, despite my best efforts, there always ends up being a certain amount of glare on one side of the frame, due to the bulging front element of the TSE. It ends up looking like I’m shooting from inside a car with the windows up… Not the case with the Zeiss, which has a normal front element. Below are examples of this, and I did my very best to position the TSE’s filter in a way which wouldn’t produce glare, but still, flat glass on an extremely convex front element doesn’t give good results…
So, you can see that until some kind of convex filter system is developed to go with the TSE (which I’m sure would end up being very expensive), it’s best to just not worry about using any front filters with it…
Sharpness tests and 100% crops
So here we are where all of the finite details get scrutinized… I will be the first to admit, I went a little bit overboard with all the tests here, but it’s better to have too much information than not enough IMO.
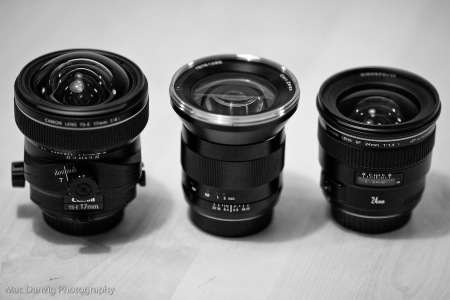
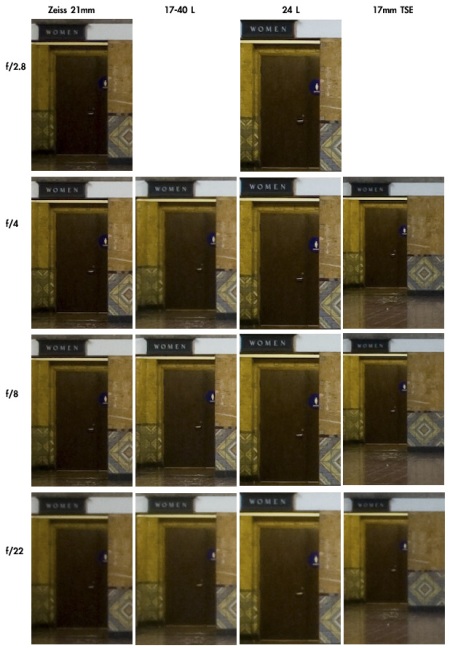
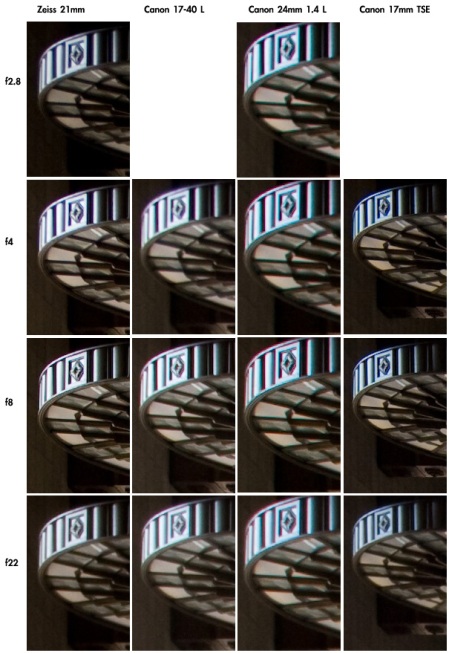
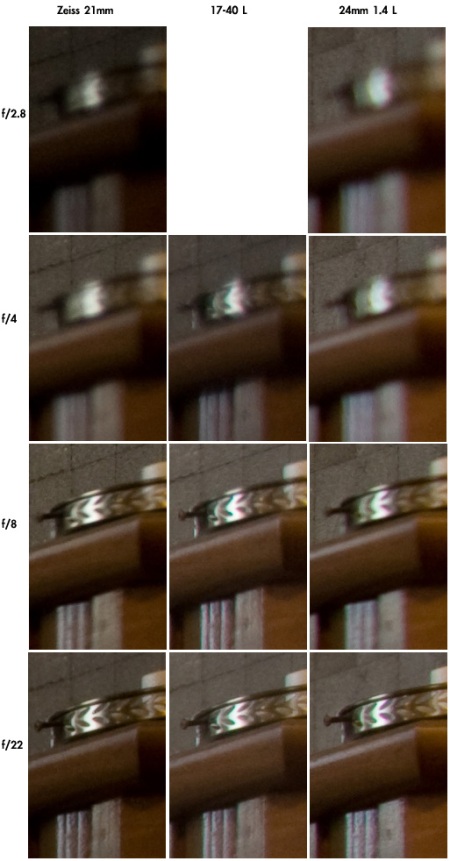
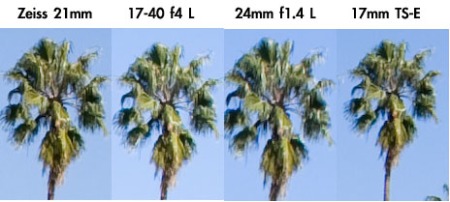
The three lenses that I tested the Zeiss 21mm with in these comparisons are 1) a very good copy of the Canon 17-40 F/4 L, 2) a Canon 24mm F/1.4 L (first version), and 3) the reigning wide-angle champion, Canon’s TS-E 17mm F/4 L. Now, some people may feel that these are unfair comparisons, since the 17-40 isn’t a prime and the other two are of different focal lengths… But in my opinion, apples and oranges they are not. If you are trying to get the very best detail out of your expensive camera body doing wide angle work, then there is a good chance you’ll consider one of these…
I did my best to physically move and “foot zoom” slightly during the making of these test shots to help make the 100% crops a little bit closer in reproduced size, but in all of them you should notice a difference in the focal lengths, even if only slight…
As always, all shots are tripod mounted, using mirror lock-up, remote shutter and are unprocessed jpegs, straight out of the RAW converter.
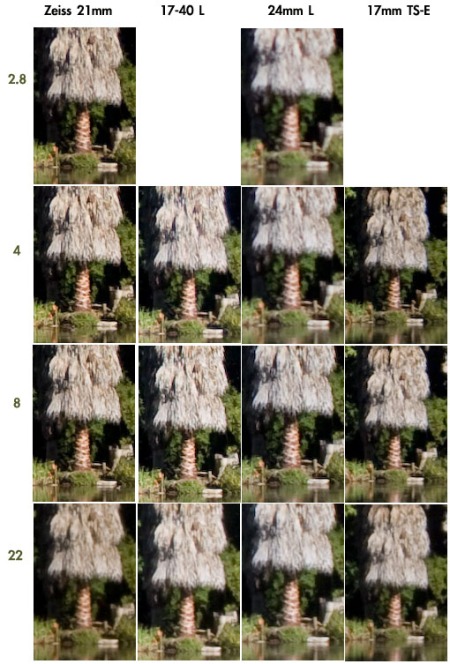
For the most part, I’ll let the following exhaustive series of test shots and 100% crops speak for themselves… After all, if you’ve read this far and you are going to spend time looking at all of these, you probably know what to look for and understand the differences and variances.
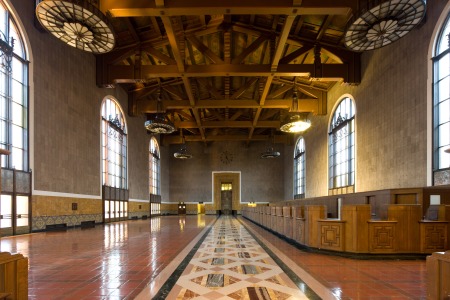
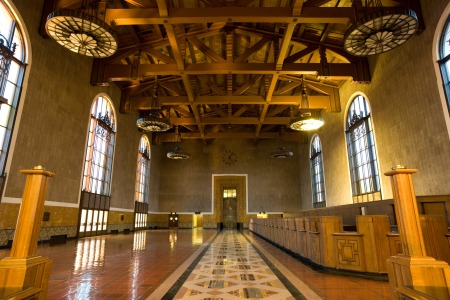
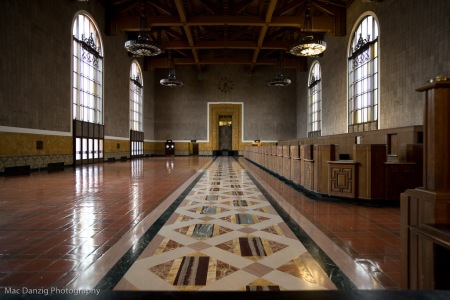
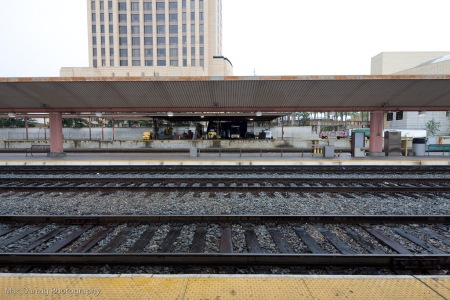
So without further ado, here they are. The first groups of crops are taken from the following indoor scene at the train station in downtown Los Angeles.
**wordpress resizes the files for the blog format, so please click on the pictures to see the full size.**
Center of frame:
Try to not mistake a difference in focal length with a lack of detail or sharpness…
Top Left of frame:
Far Right side of frame:
Right side of frame:
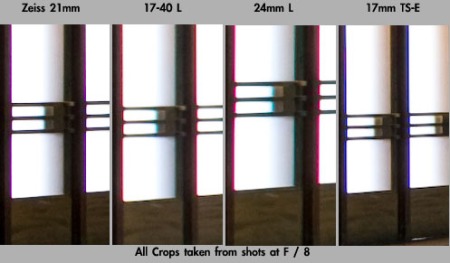
Chromatic Aberration crops, Left side of frame:
We can see right here that CA is much better handled by the Zeiss and the TSE than the other lenses…
Outdoor tests:
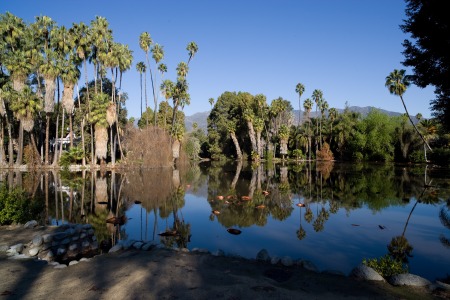
Center of Frame:
I told you I had a good copy of the 17-40… at least in the center 😉
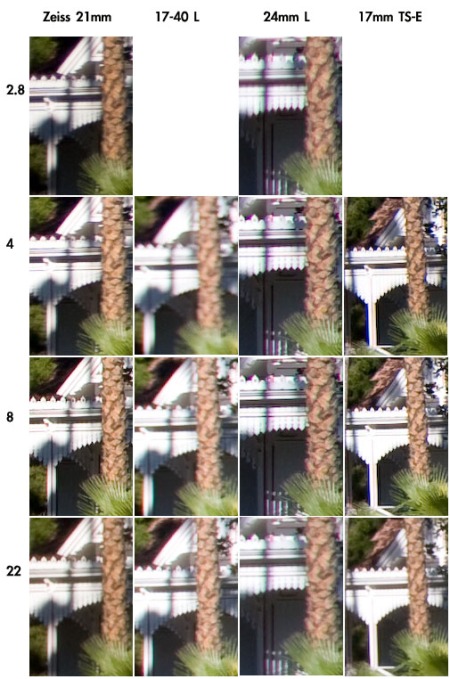
Left side of frame:
I chose this part of the left side because of the high contrast and tendency for CA. As you can see, the 17-40 falters away from the center, which is pretty normal for a wide zoom. The Zeiss is right in second place behind the TSE for sharpness and CA control.
The above set of crops are all at f/8. The Zeiss and 24L seem to have the best color rendition…
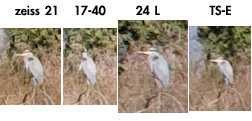
These ones are just for posterity… I happened to see this Heron in the scene in a “Where’s Waldo” sort of way and figured I’d show my bird photography prowess off…
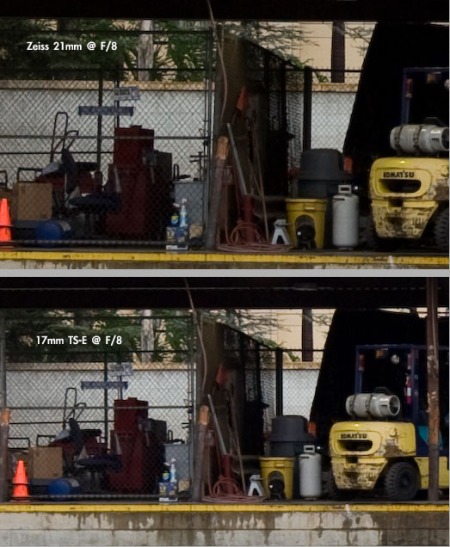
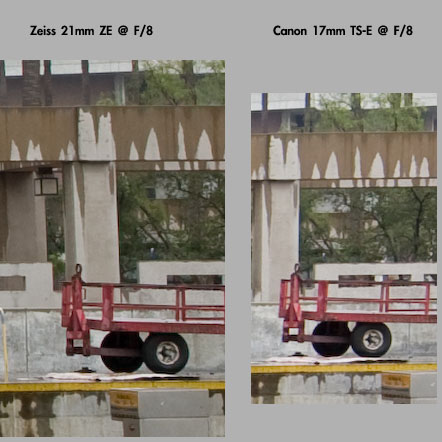
By now it’s pretty obvious that the 24L and 17-40 aren’t in the same league, so here’s the Zeiss head to head with Canon’s TS-E:
On a dreary, overcast day the optics speak for themselves much better and the lighting stays consistent…
Center of frame:
I don’t see much of a difference in sharpness, maybe the TSE wins by half of a hair… I do see a difference in color straight out of camera, in favor of the Zeiss…
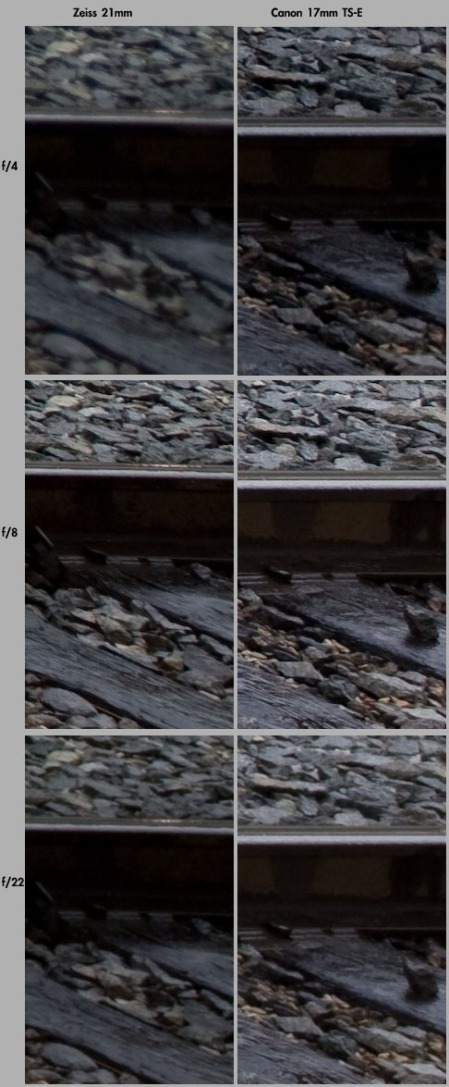
Left Center:
Middle right side of frame:
Far right edge of frame:
The Zeiss doesn’t perform at it’s best until f 5.6 and smaller. Even when taken down one stop to f/4, the TS-E beats it in edge sharpness wide-open, which isn’t that big of a deal when you consider the fact that there’s not much else out there that has sharpness across the frame like the TS-E…
Conclusion:
Overall, I’d say I’m still very impressed with the Zeiss. The $2,500.00 17mm Tilt-Shift still out-performs it in the sharpness category, but not by a huge margin. Color rendition is where the Zeiss wins big. Microcontrast too. Does this make my wide-angle lens decision any easier? Nope. Truth is, most people (myself included) can’t afford to own both the Zeiss 21 and the Canon 17 TSE. It just doesn’t make practical sense in these times. I would rather spend that extra money on a great photography trip. But if I were a big-timer then yes, I’d own both of these and I’d use the Zeiss whenever a polarizer or GND was required.
100% Crop - Far left edge... There's no way my 17-40 or 16-35 could ever give me the sharpness and distortion control at 21mm from corner to corner like this...
I still think it’s pretty cool that Zeiss has kept the same exact design on their lenses for so long.. Instead of trying to come up with a new superficial “modern” design, they’ve maintained the ability to produce a solid piece of optics in a rugged metal housing. If it ain’t broke, don’t fix it.
Hopefully this review has helped you decide whether or not this lens is for you. But, if you’re anything like me, it only complicates matters. We must realize that there will never be the ‘perfect’ piece of camera equipment. As artists and perfectionists, some of us find it our duty to search for the flaws so that we can eliminate them.
In the end, if you’re willing to pay for it, you can get pretty damn close to ‘perfect’ in the UWA range with either the TSE or the Zeiss… You need to decide which one fits your needs best.
Now, quit all this pixel peeping and go shoot! 😉
thanks for reading
-Mac
PS: If you’ve decided to that the Zeiss 21mm 2.8 is for you, buying it through This Link will help support the site a little… In addition, if you feel like showing your support, anything at all no matter how big or small you purchase after clicking through the Adorama link on the right column near the top of the blog helps out. Thanks!
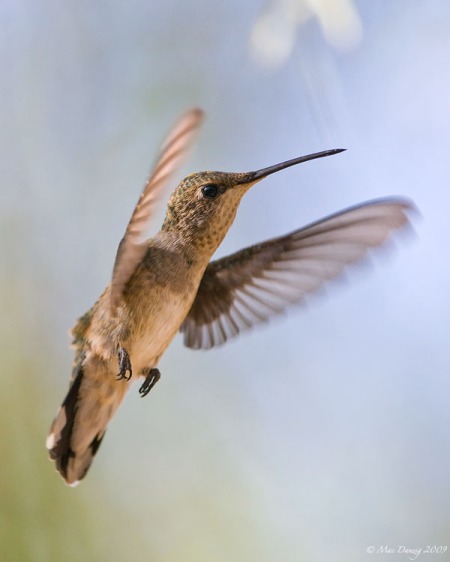
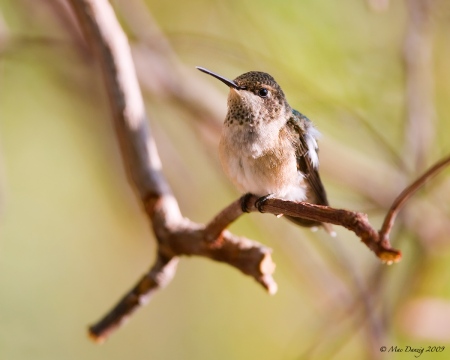
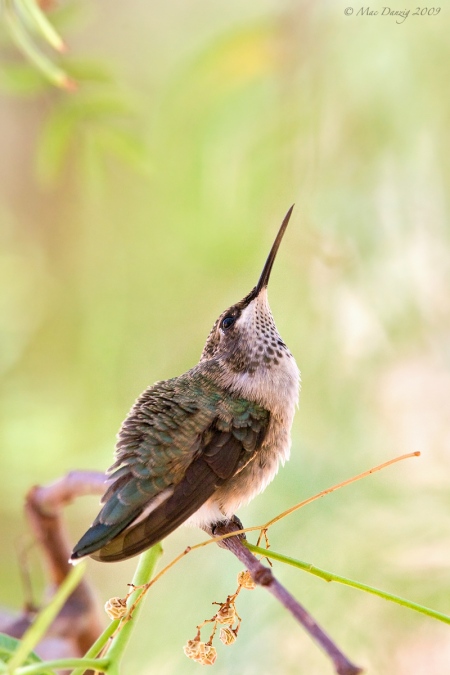
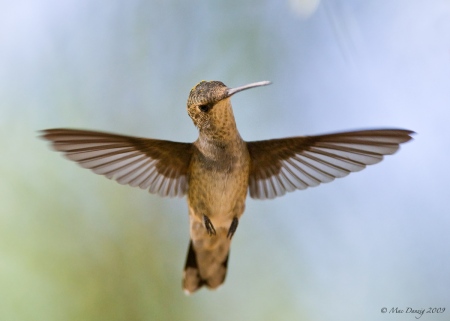
Broad-Tailed Hummingbirds in Southern Nevada
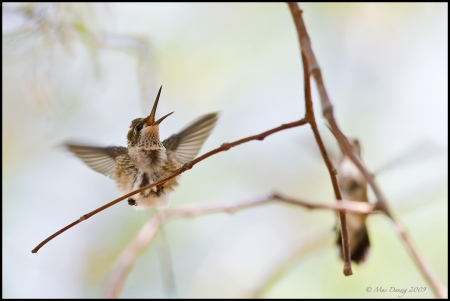
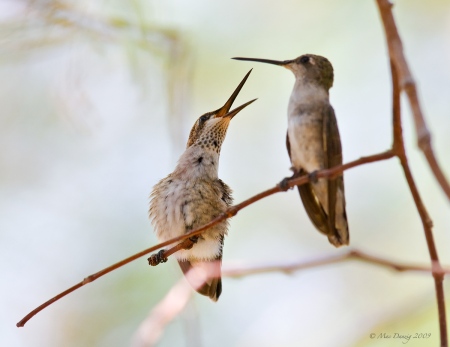
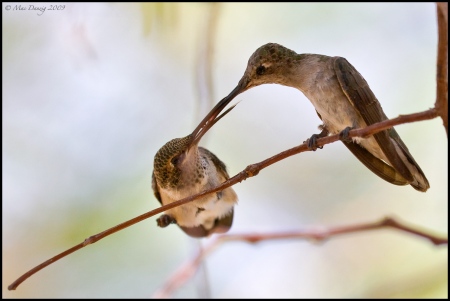
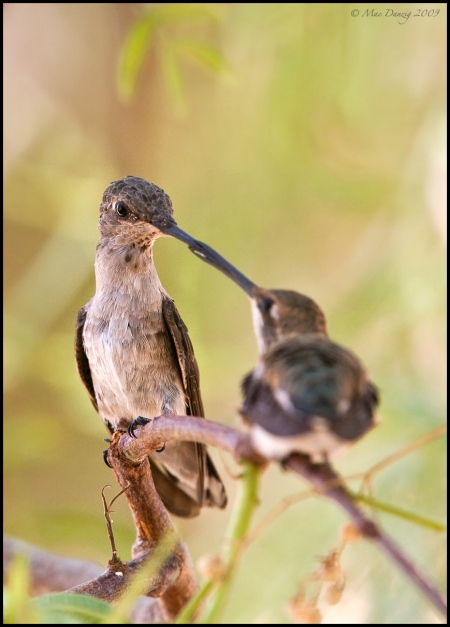
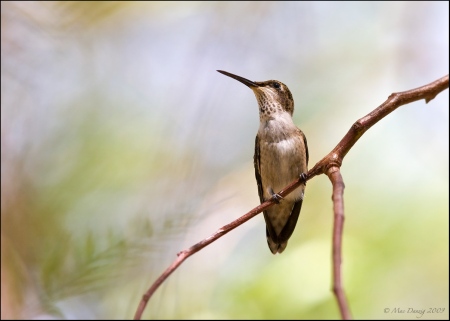
Posted in Featured Photos with tags birds, desert, hummingbirds, nevada, photos, wildlife on January 18, 2010 by macdanzigI was fortunate enough to live near an area of the Southwest this summer that many migrating Broad-Tailed Hummingbirds passed through. During a two-week period, I was able to capture a few keepers that I’d like to share.
A few of these were handheld, but most were tripod mounted. All were taken with the Canon 1Ds MkII and 300mm 2.8 IS lens. Some were also taken with a 1.4 Extender attached. As a normal practice for me, I chose not to use flash for any of these and only use natural light, waiting patiently for the right combination of bird position and sunlight. (that’s fancy talk for “I suck at using a flash, so I usually don’t bother with it”)
Post-processing was minimal and included normal color and levels adjustments and occasional cropping. Please click each photo for a larger view.
I actually had quite a hard time identifying these as Broad-Tailed due to the fact that many birds in the Selasphorus genus look similar, including Calliope, Broad-Tailed and Roufus. Add to that, the fact that these particular birds are all either female or juveniles, they are also easily mistaken for Black-Chinned Hummingbirds, due mostly to the many non-distinct features.
The trees in which many hummingbirds prefer to rest in are thick with foliage, which makes it easy for them to hide from predators. Since I don’t believe in pruning (especially if nests are present) it was extra difficult to obtain the proper angles for some of these shots since most of the time, the birds try to position themselves out-of-sight, with leaves and branches obstructing my view. For the same reasons, good lighting also proved difficult to obtain at times…
A particular pair of birds (a mother and juvenile) spent a good amount of time feeding and resting in a particular area and one afternoon I captured a great series of behavioral shots where the mother continually returned to her calling juvenile to feed it insects she had caught… Here are some of those shots:
One aspect that proved frustrating was the lack of a rich background during many of these shots… I often found many times that the birds were backlit, despite my best attempts at capturing the sun’s best angle. One thing that helps a great deal is using in-camera Spot Metering. This is why the vast majority of professionals who shoot hummingbirds often utilize multiple off-camera flashes…
Thanks for looking
-Mac







You must be logged in to post a comment.